When it comes to PPC advertising, Google Ads reigns supreme. And while the platform is complex, this guide makes it easy to get your ads up and running.
Here, you’ll find:
- What to know to get your first ads live on Google
- Common mistakes to avoid
- How to optimize PPC ads as they run
- Plenty of links for further reading
Want to run pay-per-click (PPC) campaigns? Google should be your go-to.
As one of the most powerful marketing platforms on the planet, Google not only has a massive reach, but they also have some of the most advanced targeting capabilities on this side of Facebook.
But with great power comes great responsibility — and complexity.
While building Google Ads’ PPC campaigns can seem intimidating at first, it’s not impossible for a business owner or marketing manager to tackle campaign management on their own. All it takes is a solid foundation, understanding what the heck you’re getting into, and learning how to read the results (oh, and what to do with them).
Looking for a primer on what pay-per-click advertising is? You can read all about PPC in our guide here.
Step 1: Determine your advertising goals
Easy, tiger! Before you even login to Google Ads, let’s put some thought into what you want to get out of your PPC advertising.
Common goals might be to:
- Build brand awareness
- Increase website traffic
- Generate new leads and potential customers
- Remarket to an existing audience
- Increase conversions
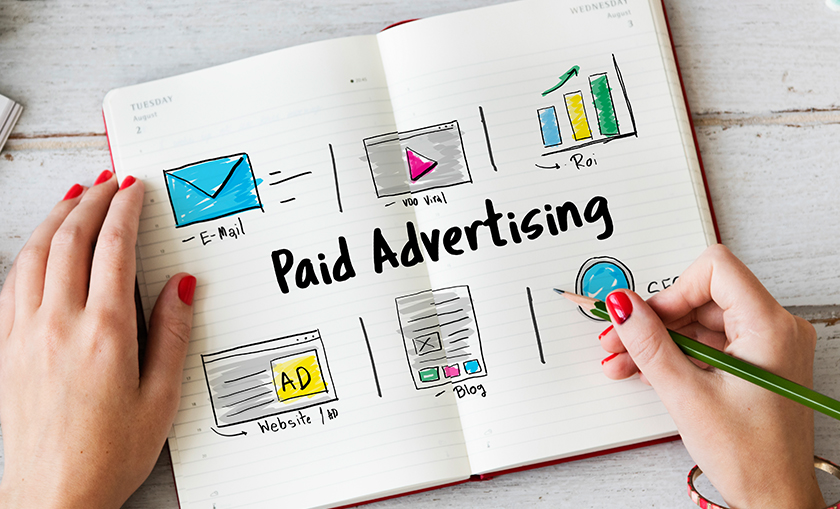
Different goals will guide your campaigns along the way and help measure your success. Ad goals are crucial to determining which kinds of ad campaigns you run, what ad copy you use, and what landing pages you create. Here, you can read more about choosing ad goals (and other ROI-driven pro tips).
Step 2: Create a Google Ads account
If you don’t have a Google Ads account, you’ll need to create one. But chances are you already have one if your business used Google AdWords (now dubbed Google Ads), AdSense, or YouTube Advertising (which Google owns) in the past.
Google’s disparate ad systems and name changes mean you may need to recover an account rather than create one.
Either way, visit ads.google.com to get started. As a bonus for new accounts, Google will give you $500 in ad credits once you spend $500 to help get you started. Free money is free money — why would you turn that down?
Step 3: Create a campaign
Creating a campaign is simple.
Google has a guided ad creation experience you can use. However, we’ve found this to be a bit inefficient, plus it hides most of the Google Ads’ essential features.
Instead, we suggest you switch to Expert Mode.
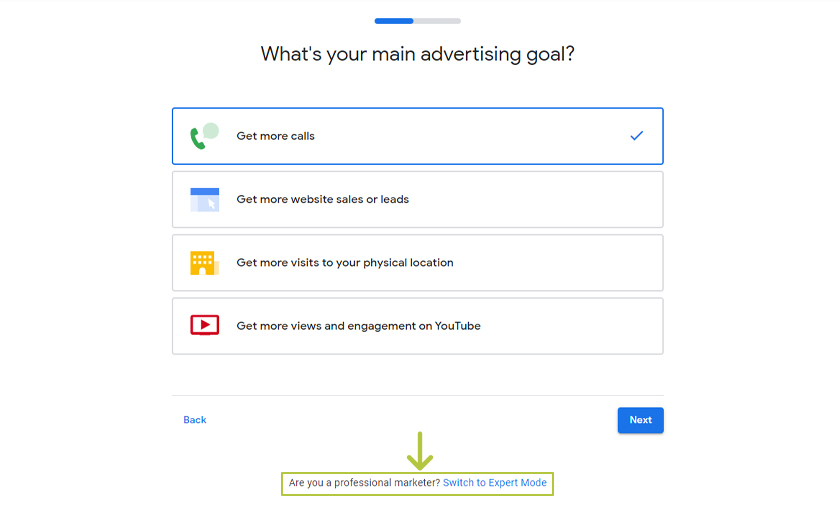
When Google asks your main online advertising goal, scroll down, look for “Switch to Expert Mode,” and click with confidence.
Next, you can choose a campaign goal or “create a campaign without a goal’s guidance.”
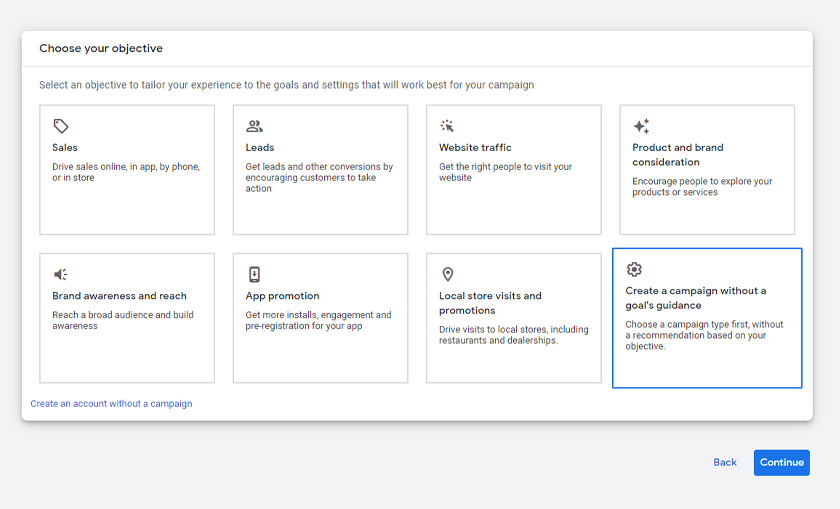
Choosing a goal allows Google to preferentially show your paid search ads to people they think are most likely to convert and help you achieve your goal.
Is Google always right? Nope. That’s why it’s often better to choose a goalless campaign for more control to specify your targeting and monitor conversions yourself.
Step 4: Pick a campaign type
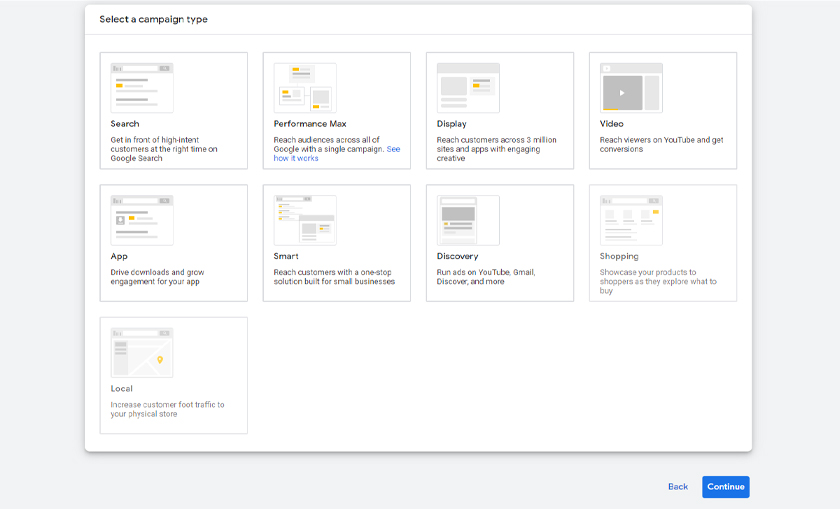
Now you’ll need to pick one of the various campaign types.
- Search Network: Text ads on the Google search engine results page and related Google apps
- Display Network: Image-centric ads on Google’s immense publisher network
- Video Ads: Ads using video that primarily appear on YouTube
- Shopping: Ads in Google Shopping for e-commerce businesses (new accounts can’t create these right away)
- App: Ads focusing on app downloads through Google Play, displayed in many channels
- Local: Ads meant to promote in-person, physical locations, and storefronts
- Smart: Automated campaigns that allow Google more optimization control
- Performance Max: A goal-based campaign that automatically displays as any of the above ad types to find highly targeted audiences using machine learning
Google recently introduced “Performance Max” and is automatically upgrading Shopping and Local ads throughout their system. You can read more about that process here.
Pro tip: Not sure which kind of campaign type to run? Google’s rundown on how to choose the right campaign type is a great starting point.
Step 5: Configure targeting options
First things first: Name your campaign. We recommend something descriptive of the goal, campaign type, and offer you’re presenting.
Now, Google provides a lot of choices when it comes to audience targeting. Choosing the wrong targeting options is one of the most common mistakes businesses make with Google Ads.
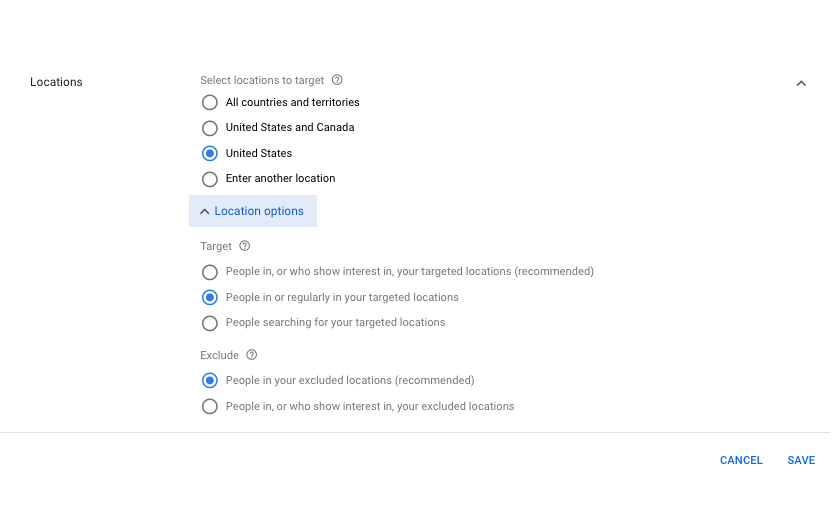
A general rule of thumb is to make your target audience as narrow and focused on your goal as possible. The more specific you are with your targeting settings, the better Google is at presenting your ads to the most relevant audiences.
For example:
- Location targeting can be focused on targeted locations and even exclude people who aren’t in that location.
- You can use language targeting if your audience is bilingual or you have alternatives you can show them.
- Keyword targeting, which is most important for search campaigns, will center your audience around people who search for your key phrases. More on this later.
- Audience targeting is an advanced option that allows you, for example, to connect your Google Analytics to Google Ads and run ads targeting people who have already visited your site before.
If you want a more detailed rundown of targeting options, Search Engine Journal has you covered. Or, if this is where you start to get overwhelmed and you’d prefer to skip the learning and time-wasting stage and hire experts to do it for you, we know just the right people.
Step 6: Configure budget and bidding options
Another mistake newbies often make with Google Ads is inefficient bidding.
Google will happily take as much money as you throw at them, and while they’ll make an effort to spend that money positively, they won’t complain if you don’t optimize your ad spend.
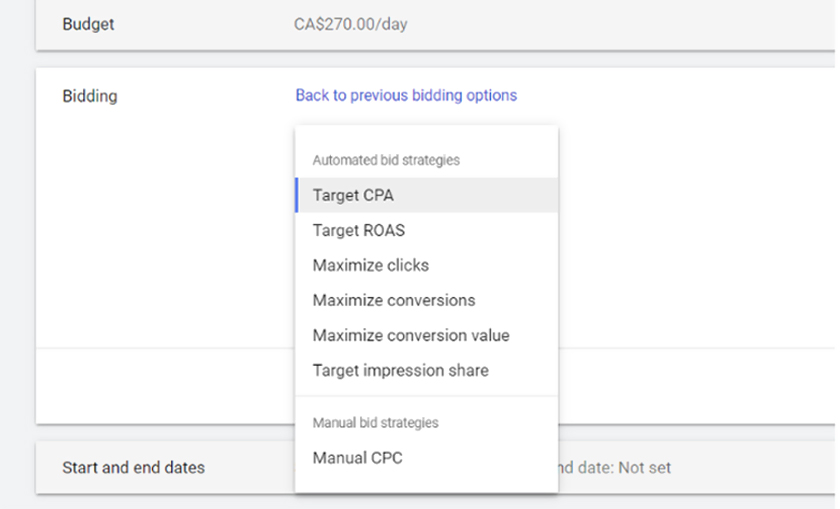
To save money, set your budget caps first.
You can set a daily budget cap, which is extrapolated into monthly spending limits. However, Google uses somewhat fuzzy math to enable them to draw on tomorrow’s budget if your ads are performing exceptionally well today.
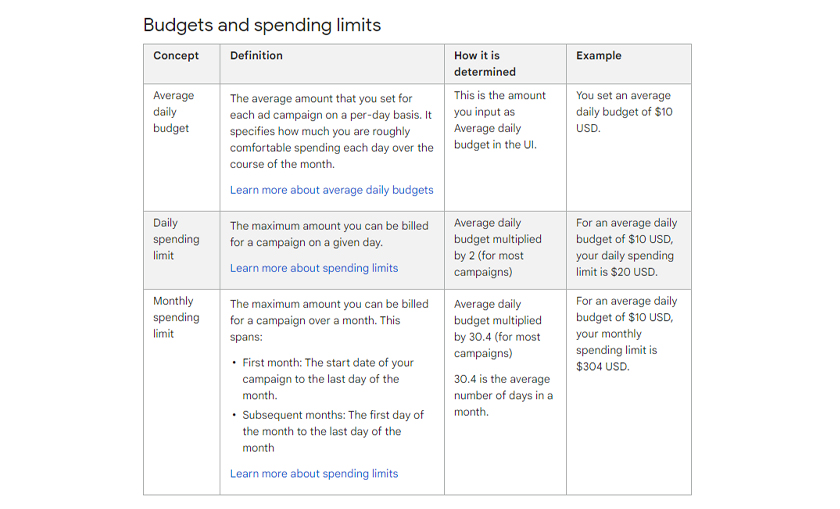
Next, set a bidding strategy.
You can let Google optimize your strategy according to your goals and ad settings, but this is a recipe for wasted money (without realizing you’re wasting money).
Instead, select a bidding strategy directly. Then, pick one of the appropriate options. Google has Smart Bidding strategies to optimize for specific campaign goals like return on ad spend, cost per action, or conversion value.
You can also choose manual CPC bidding to assign a specific bid to specific keywords. This step is where the best possible optimizations come in, but it also requires a lot of manual fiddling, so it’s best left for advanced users.
Step 7: Set extra features
There are some bonus features provided by Google that you may want to take advantage of, including ad scheduling and ad extensions.
1. Ad scheduling
Ad scheduling allows you to choose specific days of the week and times of the day your ads should (and shouldn’t) display. This option can be helpful for time-sensitive offers or products where ads shown at the right time perform much better.
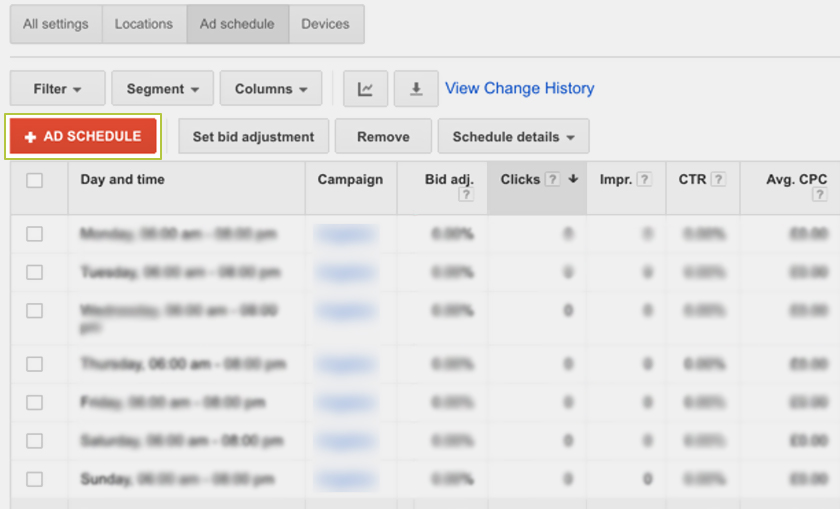
For example, a restaurant might advertise their lunch specials anytime between 8am and 1pm only. Alternatively, you might find that your ads perform better during a specific time in the day, and you may decide you only want to show your ads during that window.
2. Ad extensions
Ad extensions are additional features or links that display below your ad copy. These include:
- sitelinks to specific subpages
- callouts of helpful information relevant to a query
- a visible phone number a user can call
- location and hour information on display
- app install buttons
- pricing information pulled from your site directly
- and a range of other options
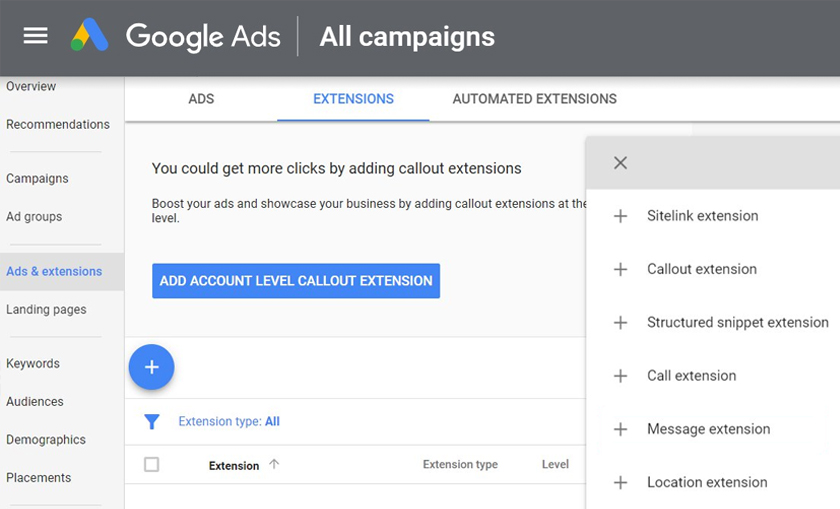
If they’re relevant to your ads, add them — they’re free and enhance your ads significantly. They increase your click-through rate (CTR), help your ads stand out from competitors, take up more real estate, and often positively impact your conversion rate.
Step 8: Choose keywords and configure Ad Groups
The core of any ad on Google comes down to your keywords and copy. Preliminary and ongoing keyword research is essential.
Psst: Our Keyword Research 101 guide can help you with your PPC and SEO strategies along the way.
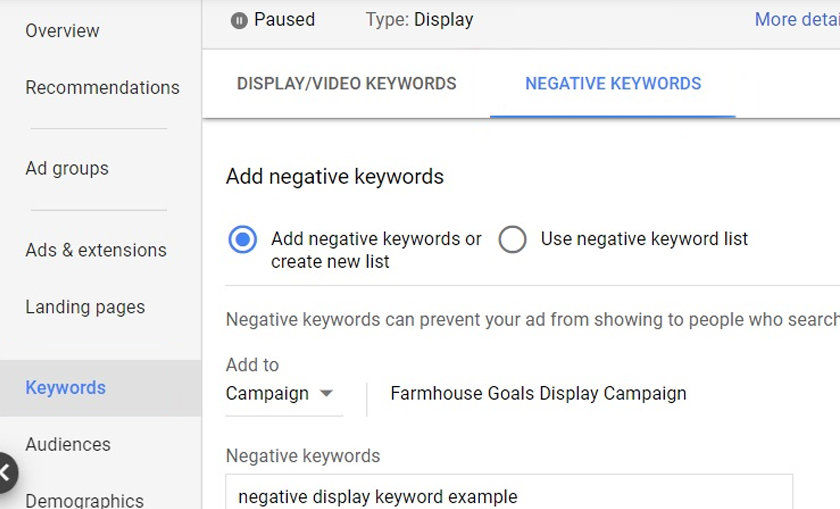
Generally, you want:
- A core focus keyword as your main search term for your PPC campaign
- Sets of focused keywords for individual ads
- Groups of longer-tail keywords to use for individual ad groups
- Negative keywords you want to exclude due to irrelevance to your offer
Keyword lists will change and develop over time, but you gotta do the legwork to get started.
Step 9: Create your ads
At this point, you’re finally ready to create your ads.
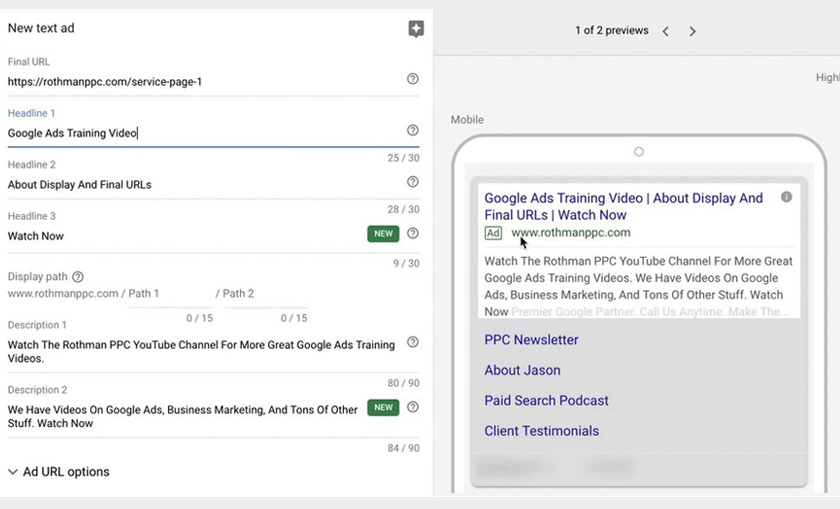
Ads need a few components to be complete.
- A destination URL is the landing page for your ad. You should tightly focus this link on the offer as much as possible; you want maximum congruence between the ad and the landing page for Quality Score purposes.
- The display URL is what your URL looks like in the SERPs. The display URL might be different from the destination URL. If your landing page URL is longer or “uglier” with UTM tags and tracking data, you can trim it down here and make it look nicer.
- Headlines. You can choose up to three headlines per ad, up to 30 characters each. Each variation should be aligned with your offer, but testing variations of keywords.
- Descriptions. You can specify up to two different descriptions, up to 90 characters each, as the primary copy for your ads.
- Media. You can add your images or videos here if you’re using display ads.
As you choose a format and build out your ads, Google generates a preview of what your ad will look like. Make sure to double-check for typos and other issues before you submit your ad for review.
Step 10: Run ads, monitor results, and optimize
Now that you’ve put your ads together, it’s time to go live.
If you haven’t already added your billing information, Google will prompt you for it before submitting your ad for review. Google will generally review and approve (or deny) your ads within a day, though your first ads might take a bit longer.
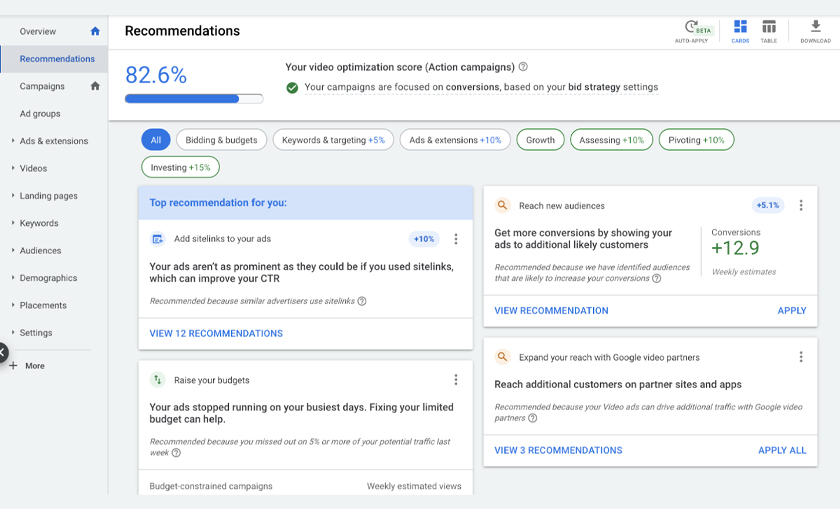
Run your ads for a while — anywhere from a few weeks to a few months.
It can be tempting to watch performance like a Hawk (see what we did there) and modify underperforming campaigns right away. But you need enough data to make decisions about your ads’ true performance.
This requires enough time, money, and audience to gather those metrics. Once you’ve collected that information, you can audit your ads to get an idea of what’s working and what’s not.
Make changes to your targeting settings, ad copy, and keywords to test further variations and optimize your ads. This marketing strategy is an ongoing process, so be prepared to return regularly to keep your ads working at peak performance and under budget.
If you want a shortcut to actionable insights that can dramatically improve your ad performance, check out ConversionIQ. This is our exclusive tech platform that syncs your important campaign data, helps you pinpoint more qualified leads, pulls the plug on wasted ad spend, and more.
The takeaway
It can take time to get the hang of a PPC platform, but it’s well worth your time. After all, Google wants as many businesses to use their ad system as possible.

Unfortunately, catering to the needs of everyone from the smallest local shop to enormous Fortune 100 companies means the ads system is a big ask.
The good news: you’re not alone. Our blog is packed with helpful information to help you along the way — and if you want the experts to do the heavy lifting for you, we’re here.

